Synthesis

My name is Daniele Clark, I’m from Florida, but I travel most of the year in two bands so I feel like I’m “from” the road.  Today  I’m going to be sharing a little about Synthesis, it’s one of the fundamentals of sound. I think the more you learn about it, the more you understand sound and music.

Louden Stearns described it this way “Once I started learning about synthesis, I started getting a language for timbre and a language for sound, and I started hearing things a little differently. Because, we don’t really have a natural language for how to describe how a note evolves or how it starts and ends.  How the timbre sounds different between an oboe and a violin. It’s hard. We don’t have words for it.”

When he said that I thought, that’s how I feel about much of what I’ve learned about the technical side of the recording and mixing process.

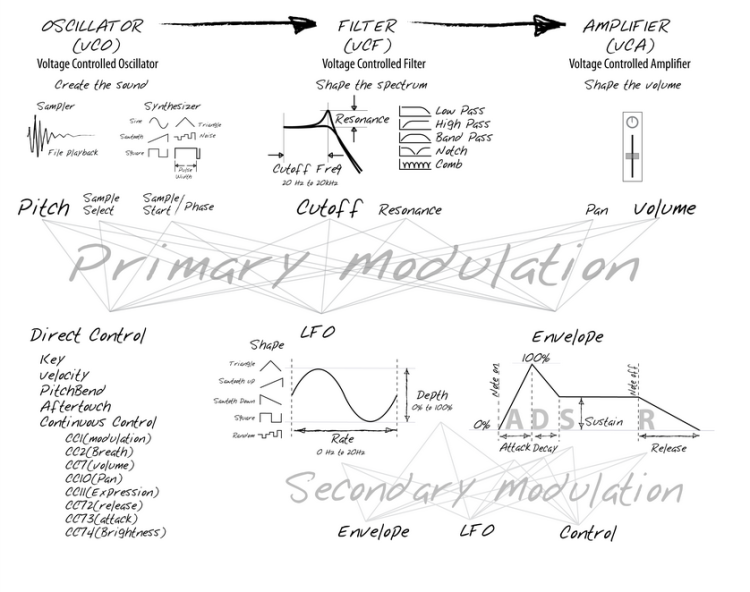
Today I will be talking about the 5 modules that are the fundamentals of synthesis.  Here’s an illustration I’ve borrowed that will hopefully help you track with me.

Modulation

Modulation

  • Oscillator
  • the (VCO) or the Voltage Controlled Oscillator is what creates the sound. We could call it the sound creator- It creates the sound based on a square wave or a saw tooth wave form or some other geometric wave form. It Usually comes across as a buzzy, bright, kind of agressive sound.
  • Filter
  • the VCF or the Voltage Controlled Filter is most commonly a 24db Low Pass Filter though it’s often just referred to as a filter. A low pass filter is the most important type of filter though other Filters are High Pass Filter’s and Band Pass Filters.

To put it in more visual terms it works something like this… The Oscillator Creates or produces the sound – Much like your voice – Then a filter moves the sound or Oscillation. The filter uses pulses to move the sound wave and manipulate the voice, noise or oscillation.    The filter removes excess high end making the oscillator sound more like a real live sound or instrument.

  • Amplifier
  • the VCA or the Voltage Controlled Amplifier  controls the volume of the sound over time and controls how it develops over time. While the filter was shaping the sound, the Amplifier is important because of the time factor and because synthesis moves.

So the filter is similar to the EQ, the difference is a synthesizer filter is
meant to move over time.
The amplifier is sort of like a gain knob or a volume fader, the synthesizer
amplifier is designed to move quickly over time.
And it’s development over time, the change over time in synthesizer language, is called modulation.

There are three kind of main modulators.

  1. The first is you – As you manually move knobs and manipulate sound over time.     Then there are two really important types of algorithmic modulators, ways that you can almost give instructions so that the synthesizer itself controls other parameters within the set. 
  2. LFO –

    The LFO creates cyclic variations in any other parameter. The LFO often controls the pitch of the oscillator

  3. Envelope –  

    the envelope creates kind of a shape that runs every time a key is pressed.the envelope, almost always controls the main amplifier, which is how we can make the amplitude change over time.  To give it a percussive or a sustaining shape

Perhaps it would have been best for me to make a video, to best portray all that I’d like to about these basic’s of Synthesis… I personally have found the learning process fascinating for myself. I have loved music all my life, I grew up around it in studio’s, live venues and at home… Being able to visualize and put names to all the things I’ve always heard and perhaps never fully understood is a very rewarding experience. I hope this gives you a little insight into why you hear things the way you do!
Short Delay Effects

Hello,

My name is Daniele Clark, I am trying to share a little about Short Delay effects today, their use and importance.

Many Audio Effects are based on Short Delay

Even a delay of 44,000 100th of a second can make a delay on your signal. All around us, all over the place, short delays take place…

It’s important to learn to listen for these delays, one example of how this sound delay works is comb filtering.

A Comb Filter is a short delay of 2 milliseconds –  It can happen during recording :

You may have a microphone setup to record an instrument but the sound bounces off any walls nearby, or really any flat surface and arrives at the microphone a little bit later. This combines the sound with a delayed copy of itself. In this case there is a definite possibility you’ll get comb filtering in your recordings. This is why it’s important to be careful about flat surfaces being nearby when you’re recording, because you will get comb filtering and it will probably negatively effect your sound.

A comb filter has a major effect on our recording because delays and phase cancellation is all around us!

Modulated short delays commonly used in mixing  are Choruses, Phasers & Flangers

They can be a really creative effect, leaving a little more room for experimentation with timing, which can add very interesting elements to your sound.

Flanger:

A Flanger is a Comb Filter in motion

It’s a slight delay that is put into motion by a low frequency oscillator. It gives an almost swirly sound, as if the music is actually moving. Often it’s done differently in the left and right speaker to give it a back and forth kind of swirly, wide stereo presence.

Phaser:

A Phaser is Deep Notches in motion

A phaser sounds much like a Flanger in that it’s a series of deep notches that move differently in the left and right speaker to give a swirling type of stereo effect. The difference : the flanger had a strict comb filter, it was even notches across the stereo spectrum. The phaser is not even across the spectrum.

Every Digital Audio Workstation has their own way of creating a phaser, the notches are organized differently but what will be the same in all phasers is that it’s a series of deep notches across the spectrum.

Chorus:

Chorus is multiple detuned copies

Why would we de-tune music in the mixing process when there’s such a focus in live and studio performances on everything being in tune? Well, it’s really only a slight detuning.

How it works is when you apply chorus: By varying the delay time you subtly shift the pitch of the note which when applied to multiple copies of the note all with slightly different delays producing slightly different pitch… You end up with an effect that almost mimics a choir or chorus of people singing together, which are all slightly off pitch with different tones, the slight “imperfections” or delays are what creates that bigger sound.

I am posting a link HERE to a song I’ve been working on which I used in a lesson previously to give you an example of the use of a Flanger & Chorus. I used both and there is a sort of breakdown of how, where and why I chose those effects in this song clip.

Dynamic Processor’s – Before and After

My Name is Daniele Clark, I will be teaching a lesson today on corrective and creative use of dynamic processors in a musical context. I will be working in Garage Band because that’s what I have available right now. If you are able to use a program that’s a little more full like Logic Pro that would be ideal.

Here’s a little clip of a song I’m experimenting with, I want to give you a before then I’ll describe what I did using dynamic processors and how they changed the sound of the track.

Before :

 https://soundcloud.com/daniele-clark/when-you-keep-running

Here’s a Track by track rundown of what I changed

Drums

I am a Bass player so I have a thing for Bass, I felt the drums were too sparse so…

In the Add Automation area I went through my Visual EQ

I  turned on the Bass Frequency & Low Mid Gain.

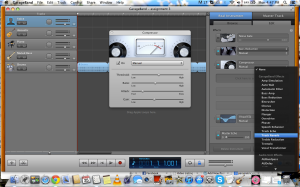
Then I turned on a compressor finally I felt like they were coming through.

Vocals

My voice was sounding a little sketchy on this track, so I tried a few different things.

First I Compressed it

I was already using a Reverb preset on the track for Female Rock Vocals

I turned on Echo

Then on the Choruses I wanted a little difference so I added Chorus at that point in the track

I just boosted it up a little because it didn’t seem very dynamic before… I’m not sure I got what I wanted, but you could experiment with doubling the track, when I have more time I may come back and do that.

Piano

Once I edited the drums and vocals I realized the Piano loop I was using was getting lost in the mix so I brought it up at the peaks of the song and then added some Reverb

Then a compressor to boost it a little

Then in the middle of the track (where that chorus change was) I brought in a Flanger.

I’m not amazed with the results but you can listen to the difference here:

After :

 https://soundcloud.com/daniele-clark/dont-blame-your-mother-reverb/s-s26U7

I am not sure that I’ve conveyed everything I’d like to here but one thing I know about music is dynamics are so important. Bringing a song way down then pulling it up and making it soar can all be done with Dynamic effects, compression and so forth.

Categories Of Effect

My name is Daniele Clark, I’m from Florida. But since I tour fulltime in 2 bands, I wouldn’t call Florida home.  I am writing this to share a little about different types of effects used in mixing – why they are used & what they are used for.

Categories Of Effect

First I want to explain what types of effects there are then I’ll give an example of how you might add an effect to your project in a DAW.

There are 3 types of Effects, each type has a different purpose.

DYNAMIC EFFECTS control Amplitude 

  • Compressors
  • Limiters
  • Expanders
  • Noise Gates

Dynamic Effects automatically control volume based on the material over time

An example of the most common reason I use a dynamic effect is – When I’m in the studio recording vocals we almost always put a compressor on them because the signal coming in from the mic varies, sometimes it’s too loud, sometimes it’s too quiet, the compressor helps bring it to a more balanced level so then they can be mixed.

DELAY EFFECTS control propagation quality

  • Reverbs
  • Delays
  • Phasers
  • Flangers
  • Choruses

Delay Effects are related to the propagation principle of sound. They add slight delays to the signal.

As an example I’ll use my own experience again — In the studio Reverb will be added after recording to “fix” the vocal tracks, make them sound a little more palatable, one way this might be done is by making it suddenly sound like I was being recorded in a big empty theater or a small room with great acoustics, instead of in a 5×5 vocal booth. These types of effects can work wonders and though when over used they will make it less natural sounding, reverb is usually added.  If I’m the one singing, what I want to hear in my headphones is a little reverb to soften the blow ;).

FILTER EFFECTS control timbre

  • High pass filter
  • Low pass filter
  • Band pass filter
  • Parametric EQ
  • Graphic EQ

Filter Effects control the timbre of the sound. So when you ask to take off some of the high end, or bring in more low end there’s going to be some kind of Filter effect.

Maybe the best example I can give of this is my experience in live performances, but it transfers over into studio recording.  I have a guitar that I love to play but I personally don’t like a high, “tinny” sound, I prefer something more full, so every time I play I either ask the sound man or I manually adjust the EQ, on my guitar I pull down the highs (treble) and bring up the lows (bass), if you’re working in a DAW you would open up the graphic EQ

Screen Shot 2013-03-25 at 4.49.31 PM

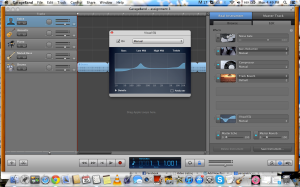
(in Garage Band this is Visual EQ) and you can manually adjust these, pulling the levels up and down.  Typically though you will find Presets or Filters already set for different types of Instruments and Vocal sounds like the ones shown here

Screen Shot 2013-03-25 at 4.51.45 PM

These filters can make recording a lot easier and quicker, though you’ll still want to fine tune, it helps to have things already set for the sound you are going for!

Then and Now

In the old days of analog recording, to add an effect to a project you had to manually plug it in. You would plug your effects into the insert on your mixer. For example my Dad used to have a Quadraverb like this in a rack mount with his mixer for all his live performances.

Quadraverb

These days it’s much easier to add effects just by turning on or adding a “plug in” in whatever Digital editor you use to mix your projects.

Here’s a little visual to help you get started & find those effects. Today I’m working in Garage Band. Open up a project and let’s go!

Screen Shot 2013-03-25 at 4.46.08 PM

Start by clicking the Edit tab over on the right hand side of the screen.

Now you’re ready to add effects!

Screen Shot 2013-03-25 at 4.46.40 PM

Click on one of the empty rectangle boxes on the side and it will give you the option to add Compression, Reverb, Flange and a myriad of other effect plug ins.

Screen Shot 2013-03-25 at 4.47.45 PM

There’s much more to learn about effects in recording, I have barely scratched the surface. But I hope this gets you started and makes the recording process a lot easier!

Preparing a Project in your DAW

Hi, I’m Daniele Clark, I’m teaching this lesson as part of the Music Production Class. I hope what I have to share  is helpful.

First let’s be clear on what a DAW is… It’s your Digital Audio Worskstation.

Now there are many options available these days and so those of you reading this may be working in a different DAW. But this is just a basic idea of what you’ll need to do to get started on a project whatever DAW you are using be it Pro-tools, Logic Pro, Ableton Live, Reason, or any of the other programs available.

So as not to overcomplicate things I will share a list of the basic routine you should follow when starting a project no matter what program you use.

Preproduction is the process that comes before-hand, each of these steps are important.

  1. Proper Project Name & Location (This step is pretty self explanatory. No matter what DAW you are working in this step is pretty straight forward open the project and name it, and be sure the name is clear. Beyond that it is probably a good idea to create a folder in a distinct location to store all your recordings so it’s easy to back them up)
  2. Now you need to set your Digital Audio Preferences this may be done on the driver for your interface or on the DAW. You want to configure for a sample rate of 48,000hertz and set Bit Depth at 24 bit recording
  3. Choose your Recording File Type. Ideally you should set this to Broadcast Wav if possible, if not set it to WAV or AIFF
  4. Now let’s set your Hardware Settings. Make sure your DAW is configured to work with your Audio Interface. Go to preferences to configure it to Audio In/Out
  5. Now Lets make sure your Buffer size is set to start at 128 samples per buffer & you can bring it up if necessary during the recording

Now you should be ready to start recording!